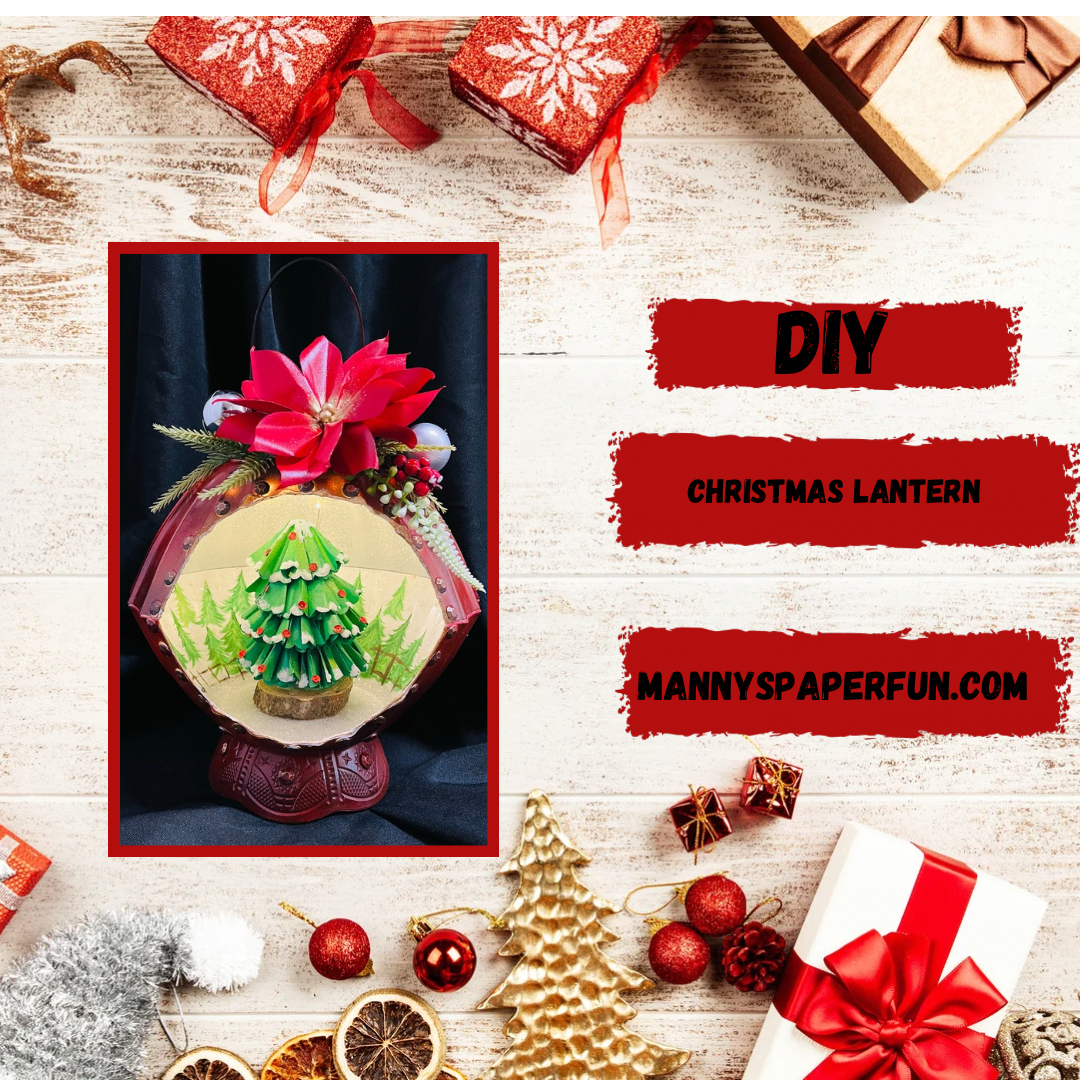
I would of never thought that by using plastic bowls I would be able to create a ONE OF A KIND lantern, but I was able to create something I can call my own creation. Take a look at the beauty I created.

Materials:
1.Two plastic bowls from Dollar Tree
2.) One small bowl (Also from Dollar tree)
3.)One Mini bowl (Dollar Tree)
4.)Glue Gun, wood burning tool, E6000
5.)Spray paint- Chestnut Brown, Metallic Gold, Canyon Black, Blossom White.(I also used Apple Red-not in picture)
6.) Pine Artificial greenery, paper Poinsettia
7.) Zip tie
8.) Rhinestones-Not in picture
9.)Gold Rub/Buff

Let’s get started by lining up both bowls and using the black marker draw a circle as this will be the opening of the lantern.

With the wood burning tool you will cut out bot half’s of the circle drawn on each half, be careful the wood burning tool gets hot.

On the mini bowl mark the two holes where you will be inserting the zip tie.


Now with the wood burning tool make the hole one each side of the mini bowl.

Then simply insert the zip tie and apply some glue on the inside to secure the zip tie. I used the E6000 for more security.

This is the small bowl that will be used for the base, notice all these bowls can be acquired from Dollar Tree.

As you can see the rhinestones are not on the picture with the materials, this happens as Im creating my pieces and I simply improvise.
*** These are optional but it will add more detailing to the lantern once its all completed. I randomly glued them on on the bowls and some to the bottom of the base and hanger.


It’s time to spray paint I started by painting the inside of my bowls with white, I sprayed two coats.
***If you don’t spay paint you can also use chalk or acrylic paint, if you do spray paint wear a mask.

Using the Chestnut brown I painted the outside of both bowls as well as the base and hanger piece.

For this step I improvised and decided to use Apple red for more color.
After you spray the Brown for the base color I randomly sprayed the Red, and then the Black was used for a rustic look.


Now its time to start putting them all together.

Start by glueing one of bowls on top of the smaller bowl (base).

You can use E6000 or you can use hot glue, I used E6000 for more security.

This next step will be different for everyone who makes this project, I decided to paint some trees and some fencing, I also painted some snow( you can’t really see it) and used mod podge to pour some diamond dust for shimmer.

On the upper half of the bowl I added some fairy lights, you can also use the puck lighting.
I simply glued the lights under with hot glue leaving the light control out as it will be glued under the base.


Once the lighting is glued then you can add any piece you want to display, I decided to make a paper tree. You can use an ornament, a reindeer, a Cardinal.

Now its time to glue both bowls, you can use both E6000 and hot glue to keep it more secure. Simply add some drops for each all around the rim of one of the bowls, align and glue.
*** Notice how the rhinestones I glued gives it more detailing.

Now its time to glue the hanger over the top half, you can either apply glue to the top or to make it easier you can apply the glue on the rim of the mini bowl and simply lay it over the top.


If you look closely I used party beads around the hanger for more detail (this step should be done at the very beginning—not planned as it happened during the process).

Grab the artificial pine and start glueing it by the hanger part laying it over on each side.

The last thing I glued was my poinsettia and some Christmas ornaments, I actually will be replacing this Poinsettia with smaller ones.

Finally its time to light it up! Voila! This is a unique piece and it will definitely be a conversation piece.
****Get creative and use different colors to match your home decor.


Leave a Reply