This is a beautiful Snowflake very different than the other two we have on our blog, I absolutely love them all. All these can be created in many colors and great decorations for Christmas and New Years.
Materials:
1.) Six sheets of paper (Astrobrights)
2.)Glue
3.) Kabob Sticks
4.) Ruler
5.)Spray paint—Apple Red
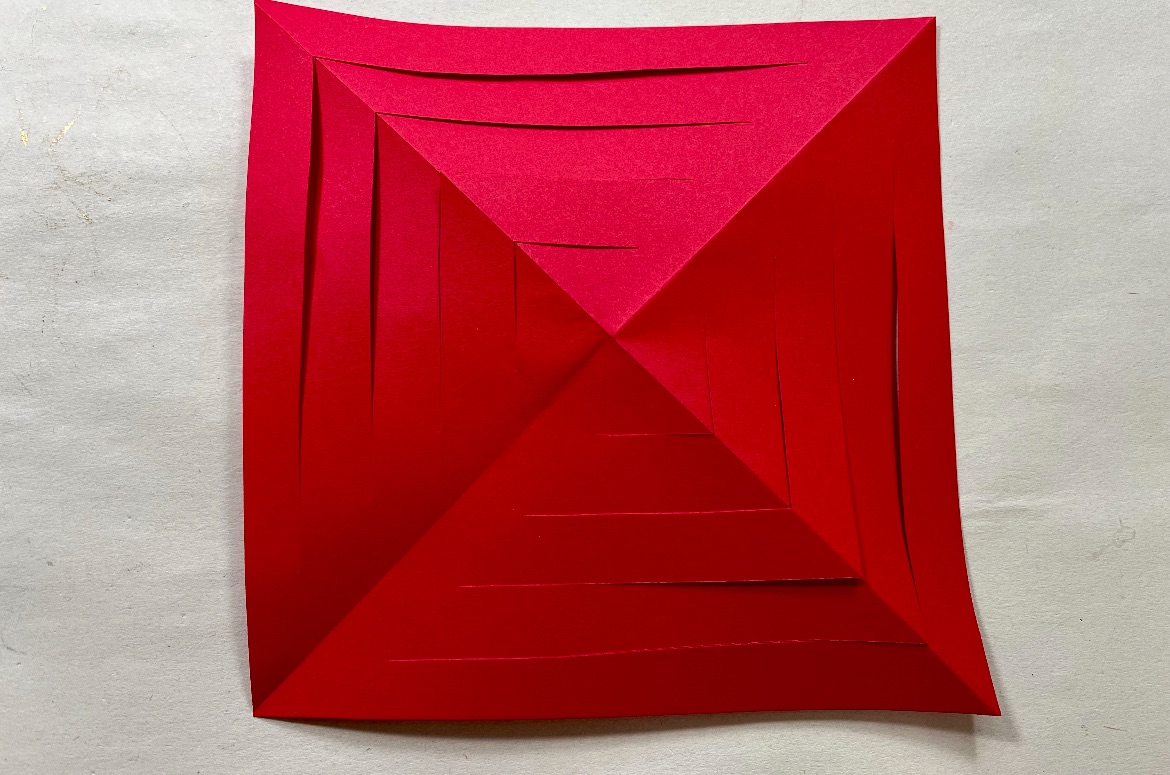
Once you make the cuts then you will open up your paper to reveal the square with all the cuts made.

Look carefully how you will be gluing, grab one of the small triangle pieces in the center and bring together and glue.

Next, turn the piece of paper over and grab the next set of triangles bring to the center and glue.

Turn it over again and repeat step until all the remaining pieces are all glued.


Once all the pieces are glued together then you will end up with one unit to make up the snowflake.
*** The steps you completed for this one unit you will repeat it to all the other pieces.

Grab one of the kabob sticks and you will insert it through all the glued pieces.

Apply glue on the kabob stick and insert and glue to keep the unit in place.

Once you have all the pieces ready then snip off the excess piece on the kabob sticks.

Now its time to glue them together, I applied glue to each end and held until glue dries and repeat until i form the snowflake.
*** If you want to add a small styrofoam ball in the center you can to hold all the pieces together.

I simply add a bit more glue to keep in place.


I sprayed my snowflake with Apple Red for more color, if you don’t spray then colored paper will be the best option.

To finish it off I added a piece of jewelry and a few rhinestones for more sparkle.
***The sparkle is completely optional.

Voila! A one of a kind decorated snowflake.


Leave a Reply