Easter eggs don’t just have to hold candy! I Saw these prismatic iridescent Easter eggs at the Dollar Tree and I had an idea to turn them into a flower, but I also had one of their small colored Easter bunnies and well I decided to create a lamp take a look.

Materials:
1.)3 Packs of prismatic eggs
2.) Small Easter bunny
3.) Oval wood plaque
4.) Moss, greenery, flowers
5.) Wooden dowl
6.)Fairy Lights
7.)Hot Glue/E600? B700
8.) Green Fern chalk paint

Start by painting the oval wooden plaque and dowel
**** Before you continue drill or make a hole at the center of the wooden place (same size as the wooden dowel) as it will help for more stability.

Each pack will have 4 eggs, I did two lamps so I bought 3 packs with a total of 12 eggs.

I started by placing them together to see how it would be put together. I used the green egg for the center, but notice how I only used the bottom half to use as a starting point to glue the rest of the eggs and form my petals.

Using a wood burning tool (not included in the materials) to make a hole on the shorter half of the center egg, make sure the hole is a bit smaller that the wooden dowel so when its inserted it fits tight.

Once you insert the dowel through the hole apply some hot glue, E600 or B700 to secure it.

This next step you can remove the tops of the eggs as they will be removed to place lights.
Start by gluing the bottom half of the egg around the center egg, I used B700 and hot glue together for more security.

Repeat the same step by gluing and making sure the eggs are secure before continuing.

I did not make the hole on my oval wooden piece until it was time to insert the dowel but as you can see I used pointy tweezers.

Go around the wooden piece and glue some moss.

Using the same tweezers I made a hole in between the bunny ears.

I also created another hole at the bottom, this bunny it appears its a bit hollow so it will be easy to work with.

Now it’s time to insert the rod on the bunny insert it from the top head very carefully.

Make sure you apply glue to the tip of the bottom of the dowel so it’s secure once you insert it to the wooden base. Make sure you also apply some glue on the bottom of the bunny or onto the base, press the bunny down and hold until it’s glued.

Use some greenery to create the leafs, you can use whatever greenery you have. You will glue these right above the bunny ears for the leafs of the flower.

You will also need some flowers to embellish, if you have an any MPF flowers use them otherwise you can use whatever you have available.

Now it’s time to wire the lights. Im using a 30 count LED lights.

You will wrap them around the bunny head leaving the battery pack behind the bunny and glue onto the base. Wrap the lights up the pole direct them to the center part of the flower.
This part is tricky as you will fold a small part of the wire towards the inside rim of the egg and apply some hot glue just to hold in place. See below.

** REMOVE THE TOPS OF THE EGGS AROUND THE CENTER EGG.
You will now start by directing the fairy lights and make sure there is a single LED light in each egg. For each egg you will fold in a small piece of the wire onto the inside part of the egg. As you are folding the LED/wire on the inside fold really tight on the rim of the egg and put the top back onto the egg to secure it, YOU WILL REPEAT THE SAME STEP TO EACH EGG.

If you did this correctly this is how the back of the flower will look like.
ALSO NOTICE THE CENTER EGG STILL HAS THE TOP REMOVED, ONCE YOU GO AROUND EACH EGG YOU MAY HAVE SOME WIRING LEFT OVER, SIMPLY INSERT IT ON THE CENTER EGG AND PUT THE TOP BACK.

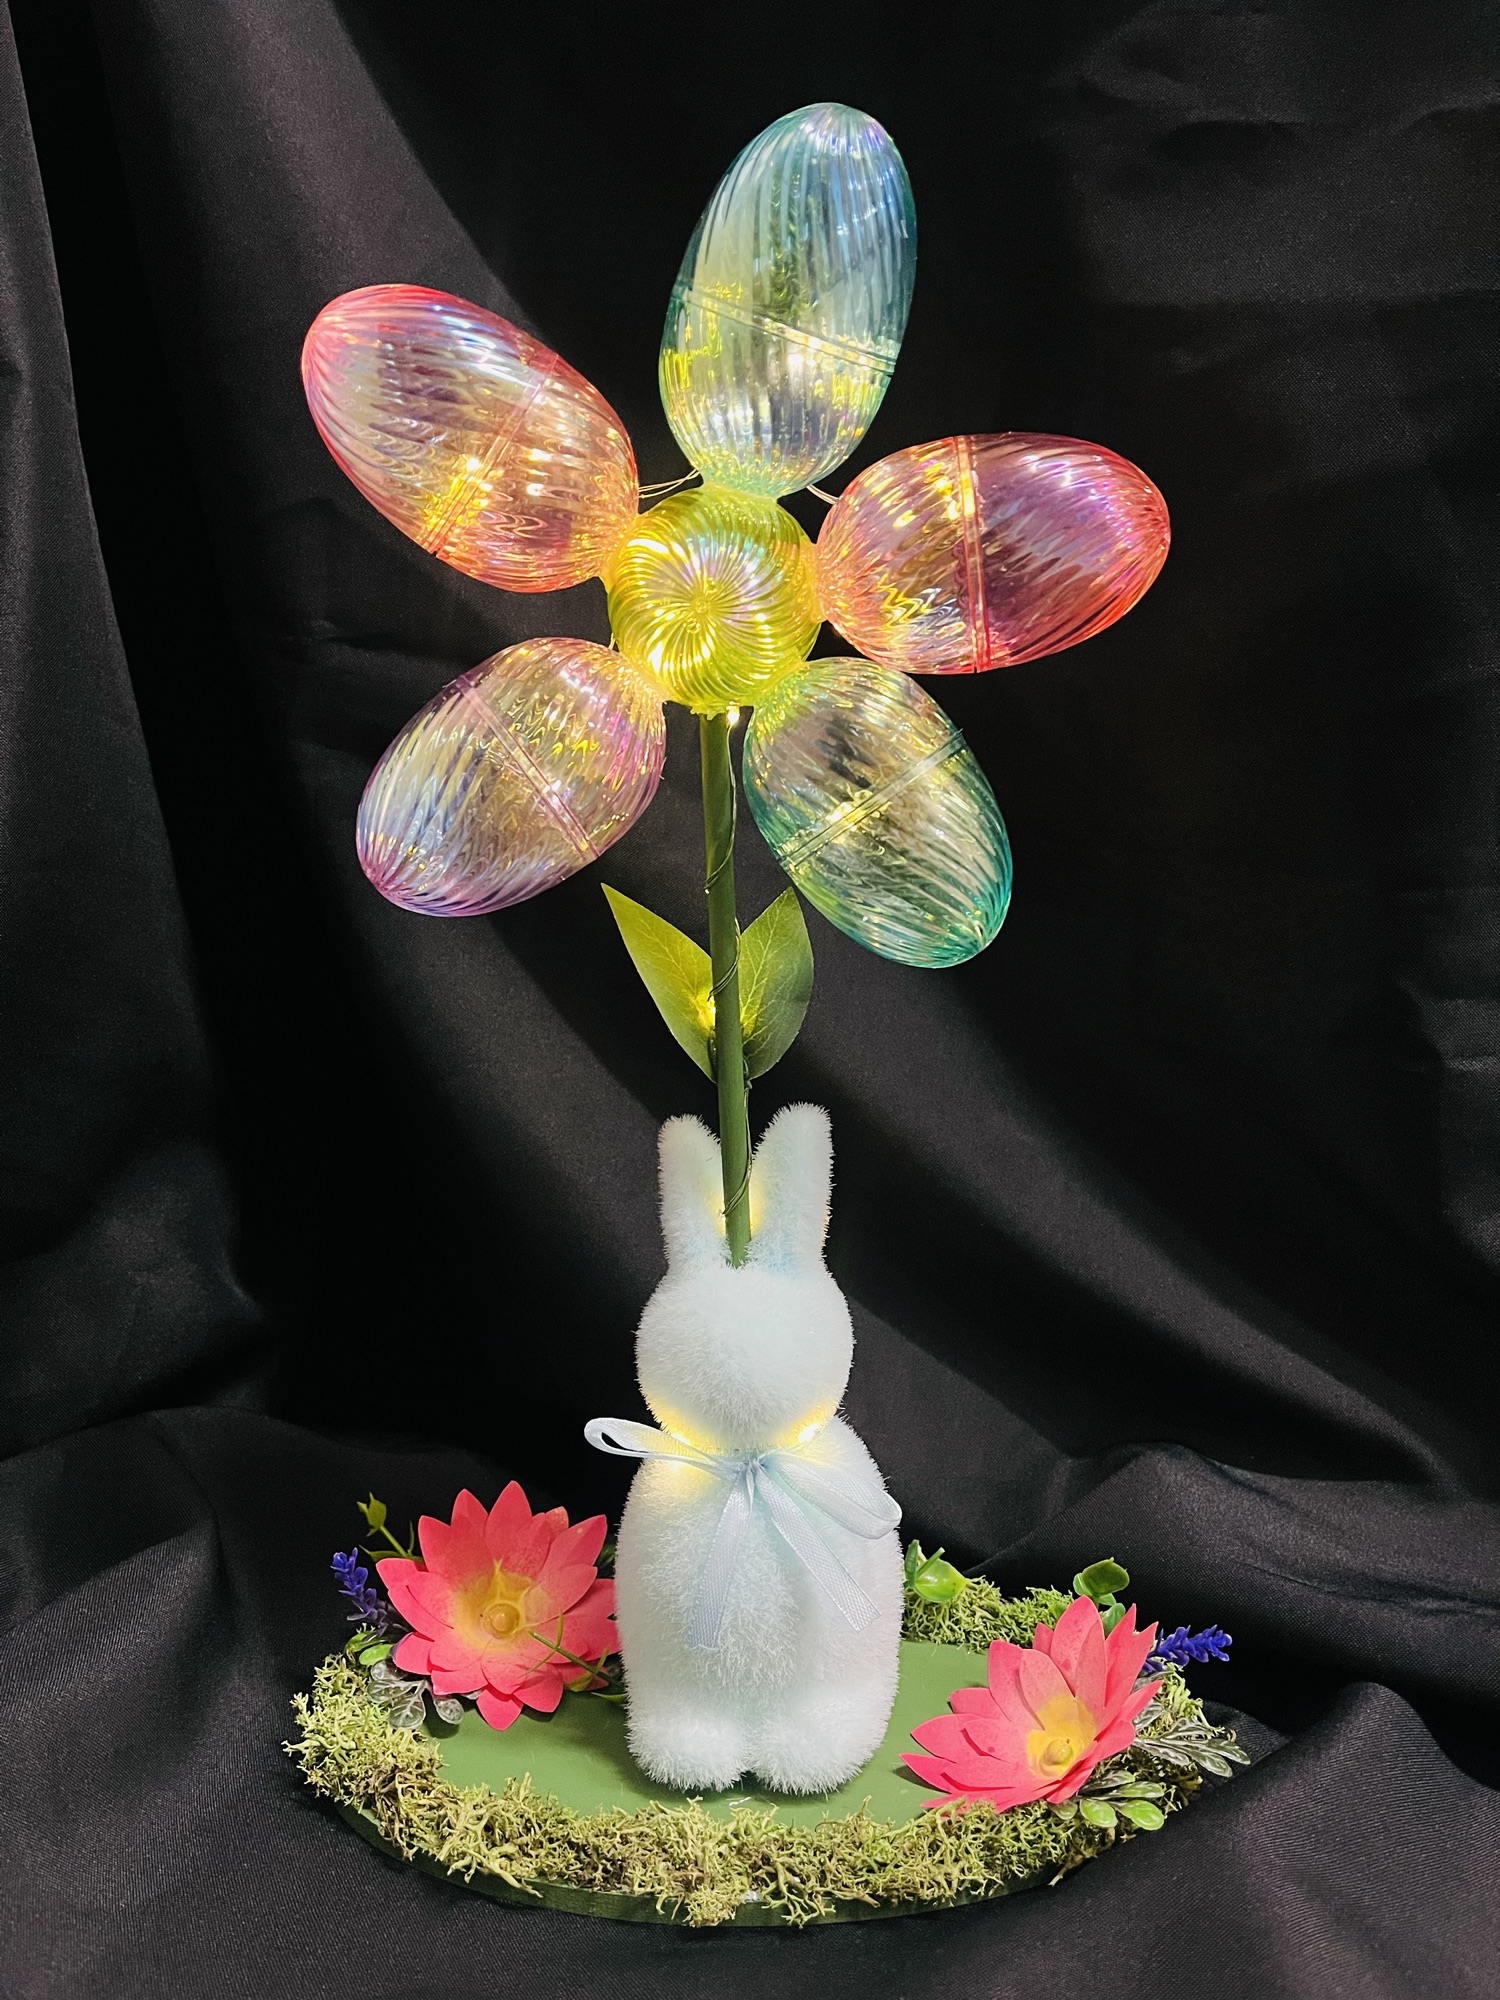
Try out the lights and this is how it will look lit up.


The end result is very whimsical and it’s perfect for a nursery, little girls room or for your Easter decor.

I created another lamp using a pink bunny. Get creative and create a neat project under 10$. Enjoy


Leave a Reply